As an alternative to programming AVR microcontrollers in MPLAB or Atmel Studio, you can use VSCode with the PlatformIO extension. AVR chips are somewhat dated compared to Espressif boards, but if a class or project still requires one, this workflow is much nicer than fighting legacy IDEs.
Why PlatformIO + VSCode?
Pros
- PlatformIO supports a huge range of boards and frameworks — not just Microchip parts.
- If you already live in VSCode, you keep one IDE instead of learning MPLAB for one-off AVR work.
Cons
- MPLAB has official Microchip support and tighter device integration.
- Some fuse/bootloader tooling is more hand-holdy inside Atmel Studio.
Both approaches are valid. I prefer VSCode, but getting started took more research than it should have. This guide is the walkthrough I wish I had.
Prerequisites
- VSCode installed + basic familiarity
- Basic breadboarding
- An AVR microcontroller
- A programmer (any Arduino or ESP board works)
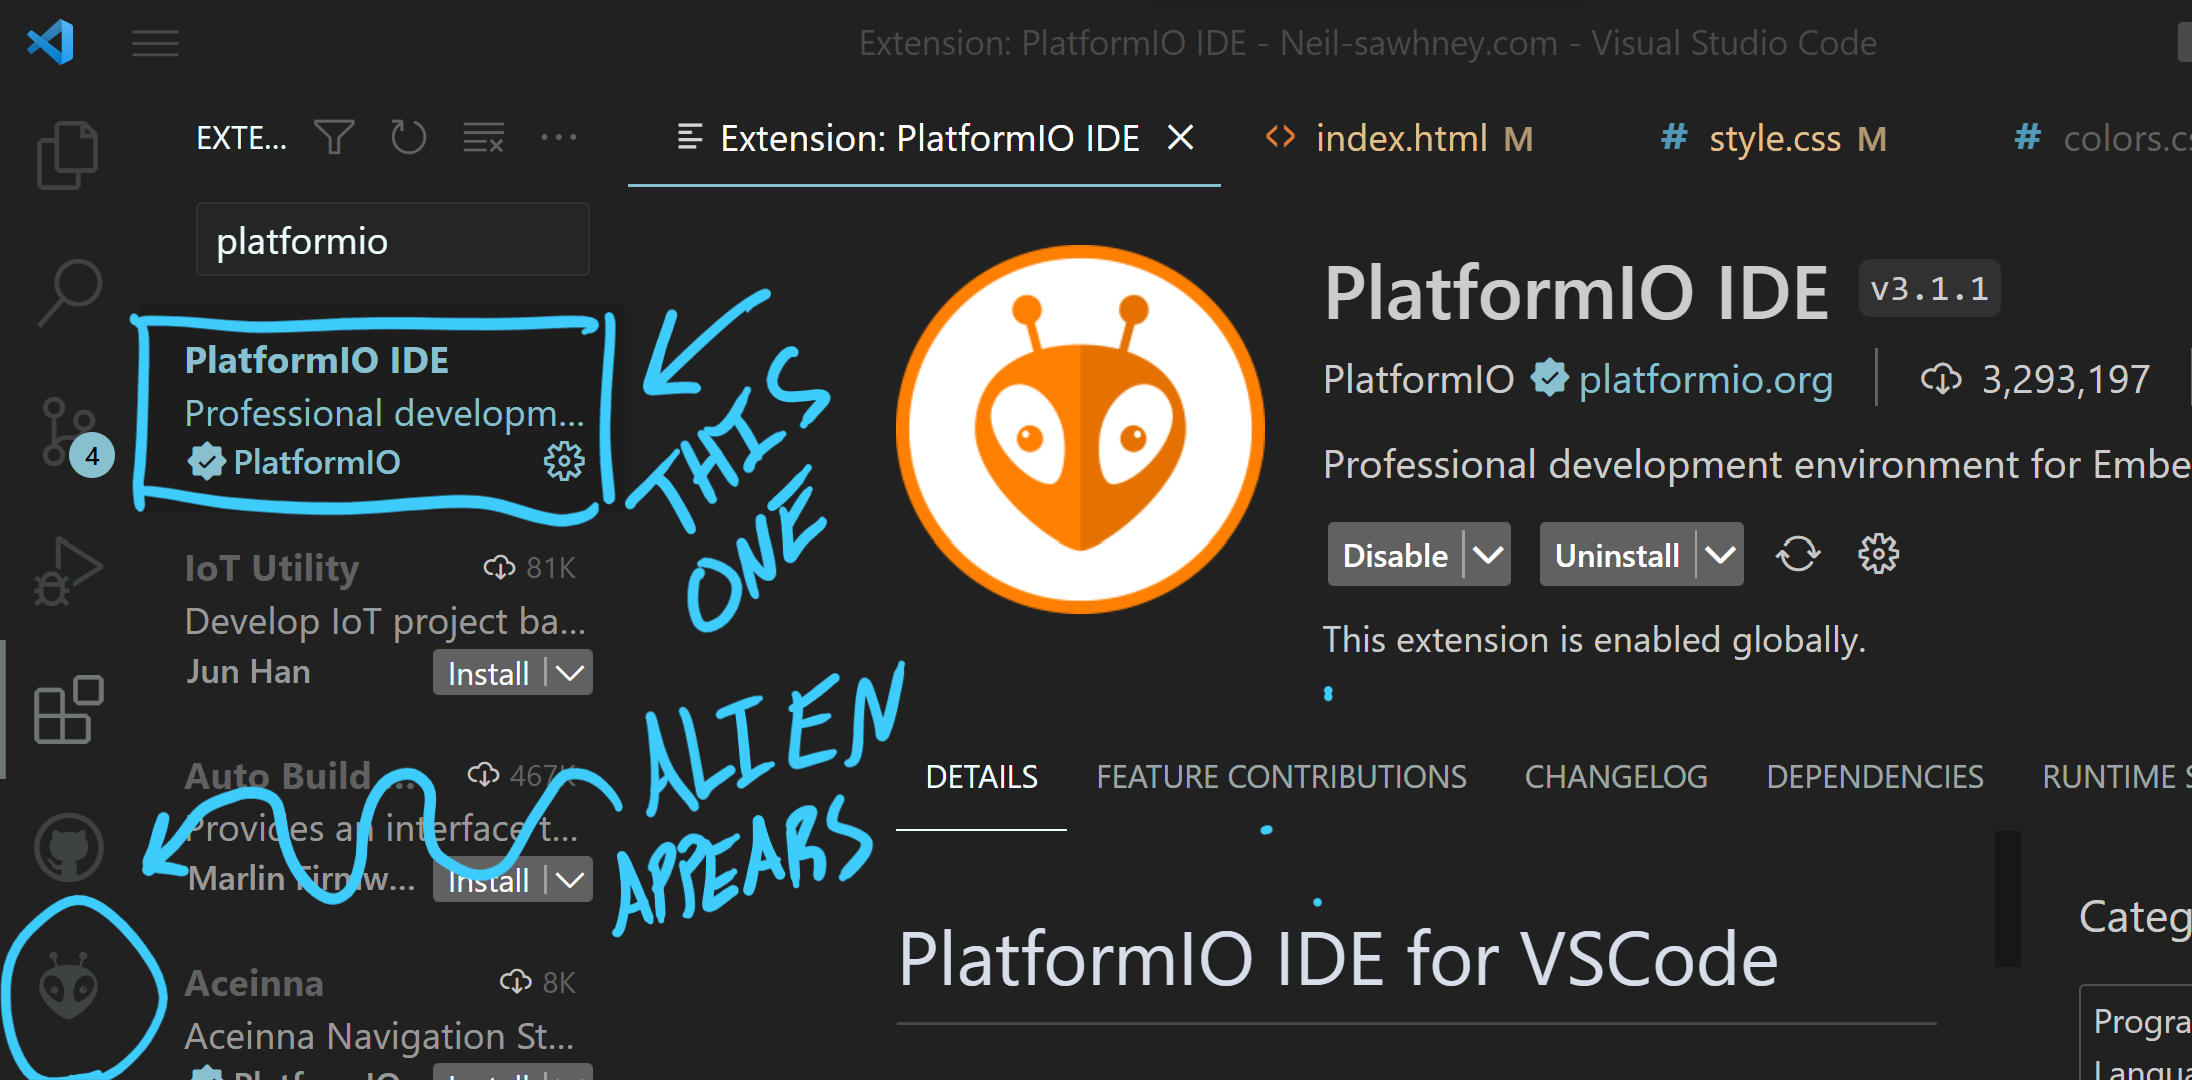
Step 1 — Install PlatformIO
Open VSCode → Extensions → search PlatformIO IDE → install.
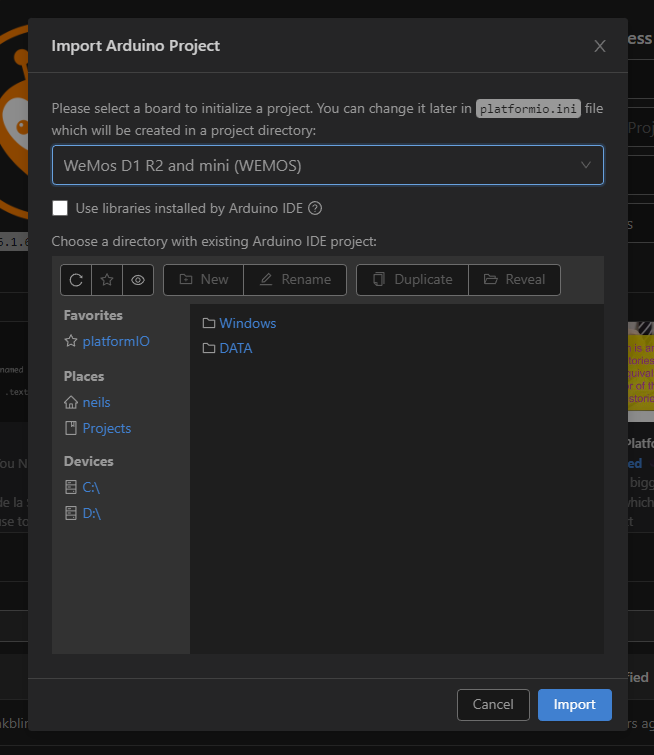
Step 2 (optional) — Turn an ESP8266 into an AVRISP programmer
No dedicated programmer? Use an ESP8266 (I'm on a WeMos D1 mini) flashed with Arduino's AVRISP example.
- Grab the example from this gist.
- In PlatformIO Home → Platforms, install Espressif 8266.
- Import Arduino Project, point at the unzipped example, select your board.
In src/main.cpp, set GPIO pins for your board. On the D1 mini I used:
#define RESET     D8
#define LED_HB    D1
#define LED_ERR   D2
#define LED_PMODE D3
Add to platformio.ini if needed:
upload_speed = 9600
upload_port = COM10
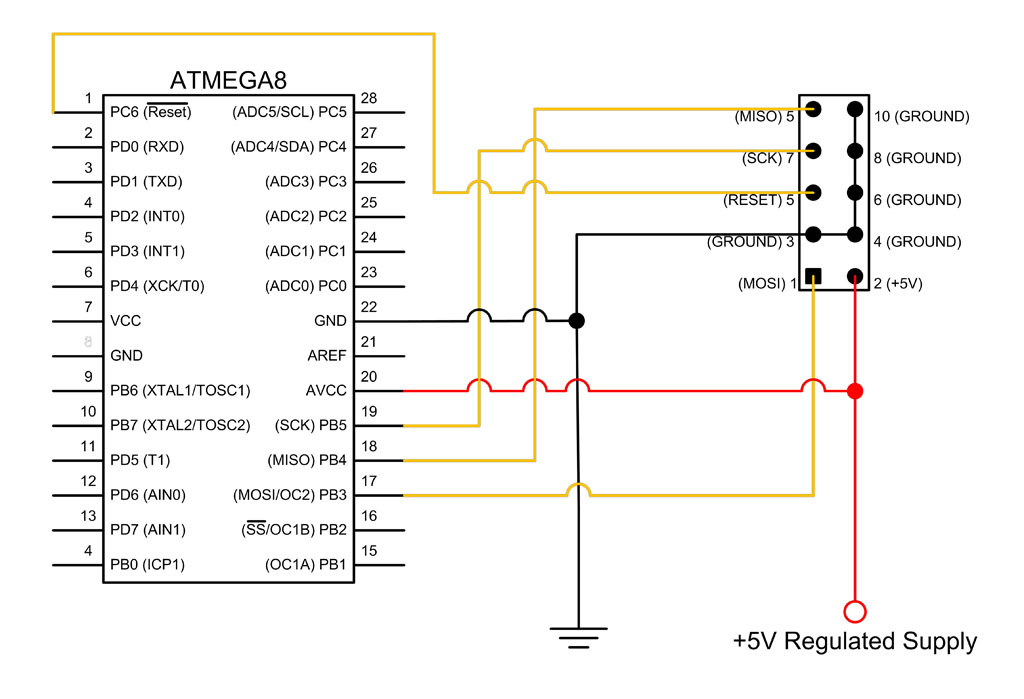
Upload the sketch (Ctrl+Alt+U). Wire MOSI, MISO, SCK, VCC, GND, and RESET to your target AVR.

Step 3 — Create an AVR project
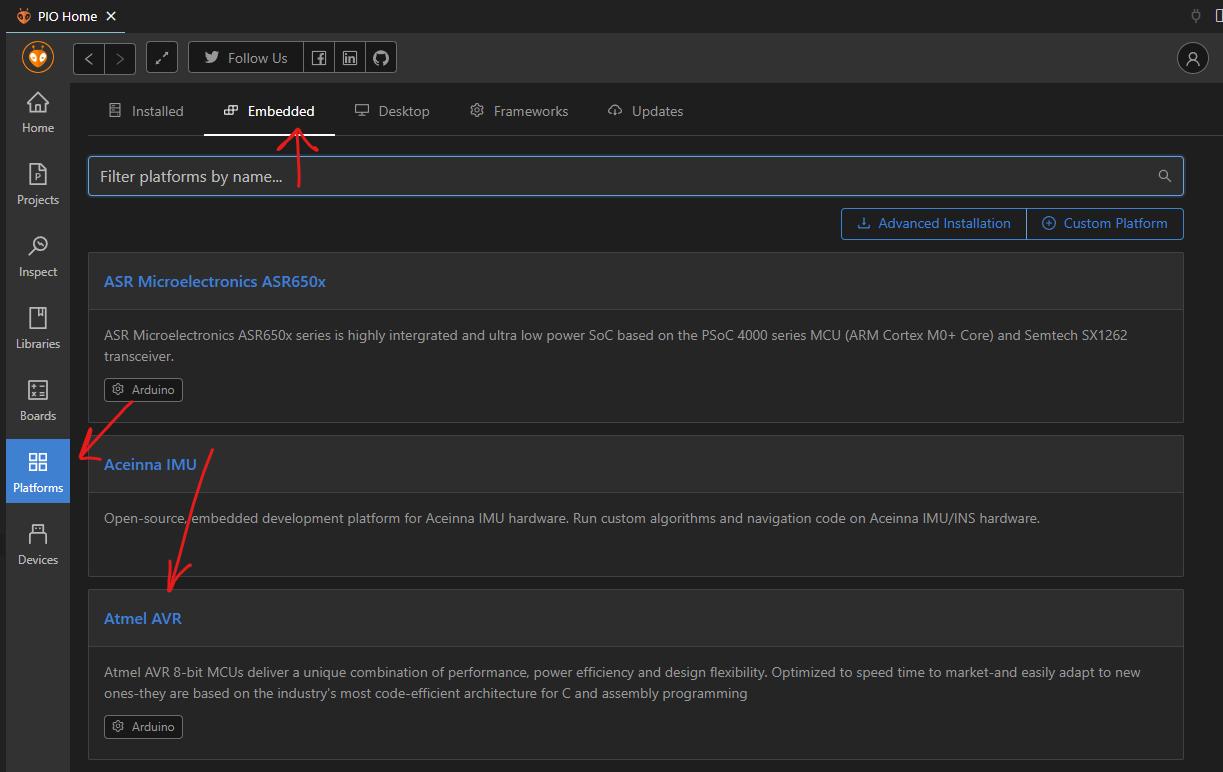
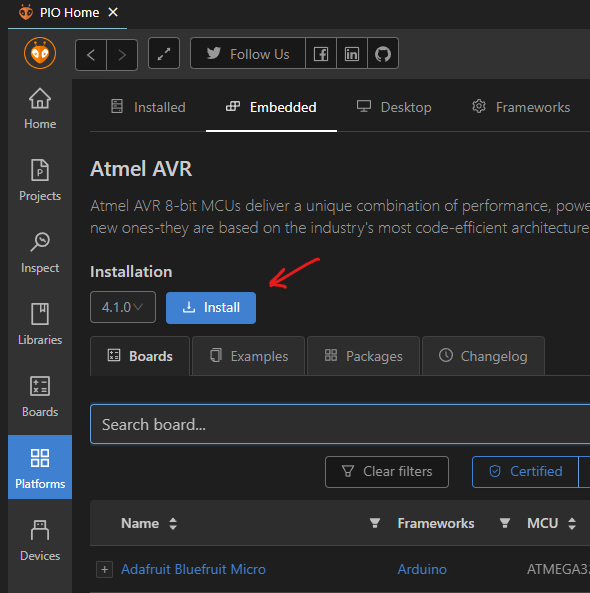
- PlatformIO Home → install the Atmel AVR platform.
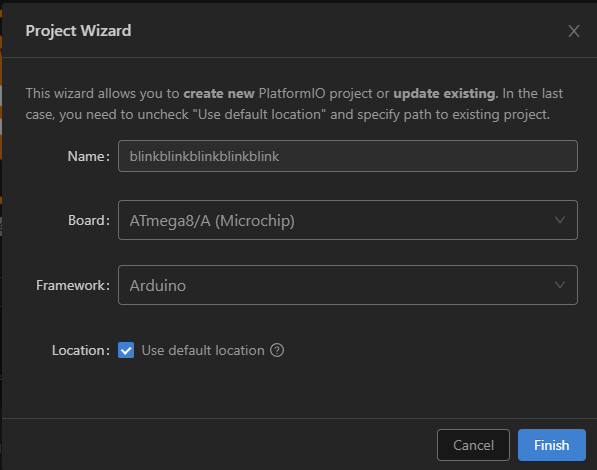
- New Project → pick your board (mine: ATmega8).
Step 4 — Configure platformio.ini
Remove framework = arduino if you want bare-metal C.
For an ESP8266 AVRISP programmer, add from the PlatformIO AVR docs:
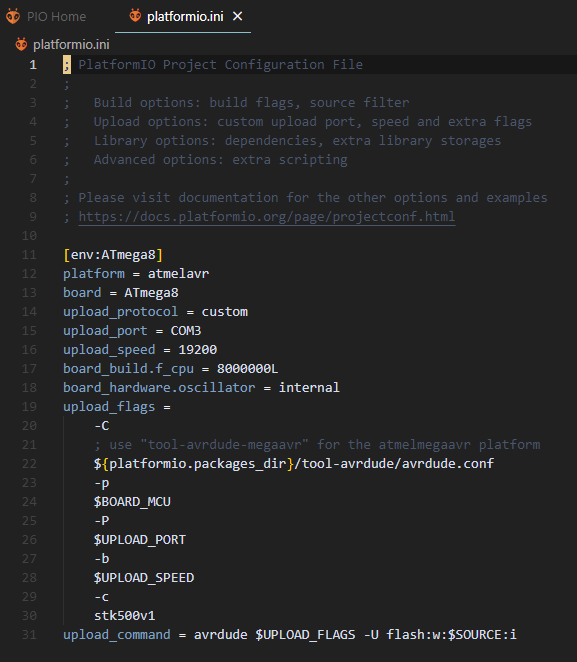
[env:ATmega8]
platform = atmelavr
board = ATmega8
upload_protocol = custom
upload_port = COM3
upload_speed = 19200
board_build.f_cpu = 8000000L
board_hardware.oscillator = internal
upload_flags =
    -C
    ${platformio.packages_dir}/tool-avrdude/avrdude.conf
    -p
    $BOARD_MCU
    -P
    $UPLOAD_PORT
    -b
    $UPLOAD_SPEED
    -c
    stk500v1
upload_command = avrdude $UPLOAD_FLAGS -U flash:w:$SOURCE:i
Critical: set board_build.f_cpu and board_hardware.oscillator to match your chip. Wrong values can brick communication until you fix fuses. The ATmega8 I used has an 8 MHz internal oscillator.
Step 5 — Write firmware
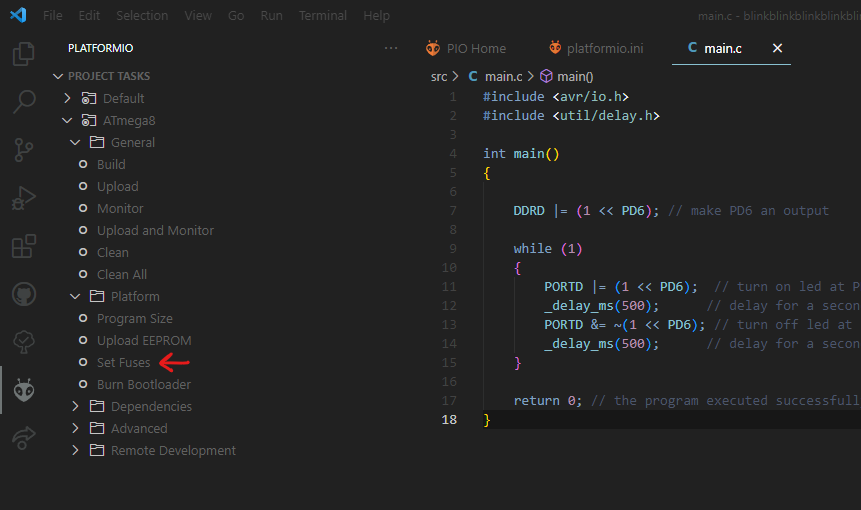
Delete the default main.cpp if present. Create src/main.c:
#include <avr/io.h>
#include <util/delay.h>

int main(void)
{
    DDRD |= (1 << PD6);

    while (1) {
        PORTD |= (1 << PD6);
        _delay_ms(500);
        PORTD &= ~(1 << PD6);
        _delay_ms(500);
    }

    return 0;
}
Step 6 — Set fuses
Double-check CPU frequency and oscillator settings in platformio.ini.
PlatformIO sidebar → Set Fuses. (Arduino framework users may also need Burn Bootloader.)
Step 7 — Upload
Press Upload (Ctrl+Alt+U). The target won't run until RESET is released — I use a normally-open push button between the programmer RESET line and the MCU so I can hold it during upload and release to run.
That's it — LED on PD6 should blink.